My Piano Studio
Sorry I have not posted in a while. I was super busy moving into our new house & now we have a baby on the way, so life is even more busy!
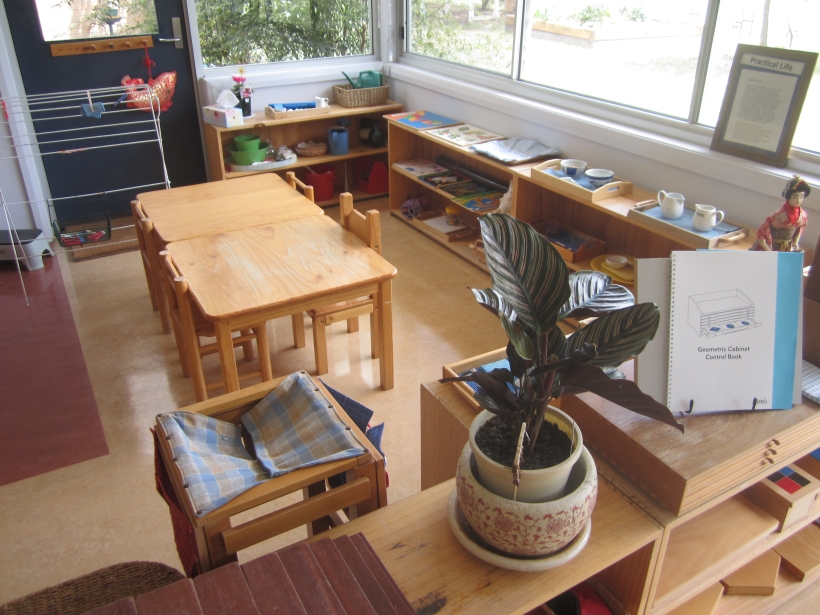
Lets go from where we left off. On the last blog I posted some photos of an empty studio space. Now it’s time to show you what it looks like full!


As you can see the room is made for the child. I have child sized furniture, shelves and the artwork is hung at their height. The things that are mine are kept next to the piano.
I find that the children are drawn into the space as soon as they walk in. Usually a piano teachers teaching space is very un inviting and does not look child friendly. My main aim is to teach them piano, but to teach them about music as well in a fun and engaging way using hands-on materials. My favourite age group to teach is probably the 3-5 year olds as this set up works so well for them.
What’s on my shelves?
Now I will show you what is on each shelf! Each shelf is a different colour and corresponds to a different music category (composing, note recognition, note value, musical instruments/rhythm & note reading). The shelves are changed slightly each term. If I find the children are not drawn to an activity I change it. I also add Valentines/Easter/Halloween/Christmas activities when its the appropriate time.

This is the composing shelf. I will list the activities below
Very Top Shelf
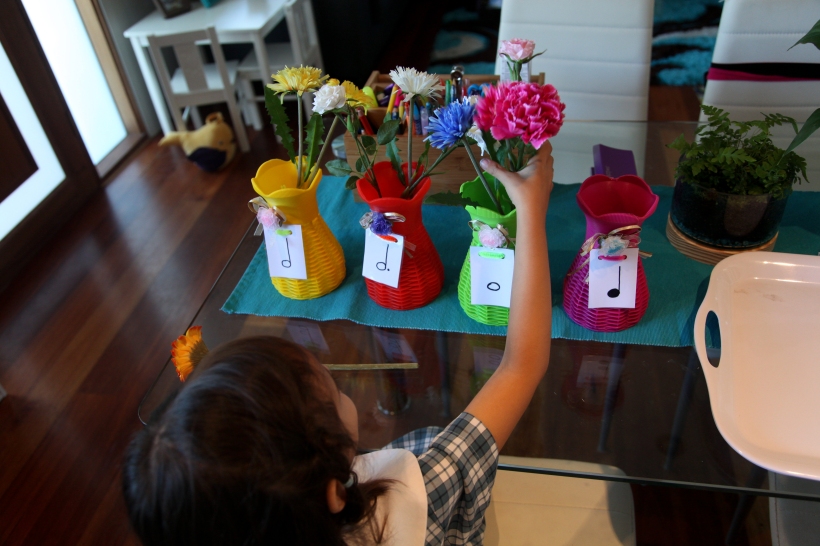
Coloured bells
can be used as an aural activity- Choose a bell and find the matching note on the piano. These are also used for the painting activity at the bottom where students compose using the bells.
Top Shelf
Romantic composer book– Colour in the composer and create a book. Music by the composers can be played as the child colours in. I created these books myself. I was inspired by the little books they make in Montessori classrooms.
Composer flip book- I focus on one composer each term. This term I have chosen Brahms. The child can listen to music by Brahms while creating this book which includes facts about the composer. This activity is from teachers pay teachers. Simply type in composer flip books
Composer bookmark– The child listens to the composer and colours (from teachers pay teachers). I use spotify to play music from my phone.
Composer finger puppet– The child also listens to the composer and colours a fingerpuppet (from teachers pay teachers)
Middle Shelf
Composer Colouring– The child listens to the composer and colours (from teachers pay teachers)
Play a story- I found this idea online and made my own. There are picture cards the child picks from to make a sound story at the piano. They get to experiment with creating sounds.
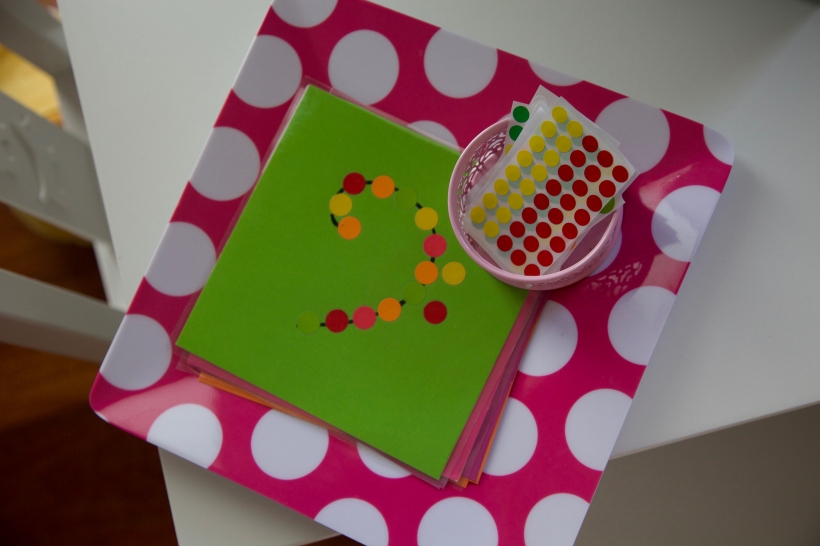
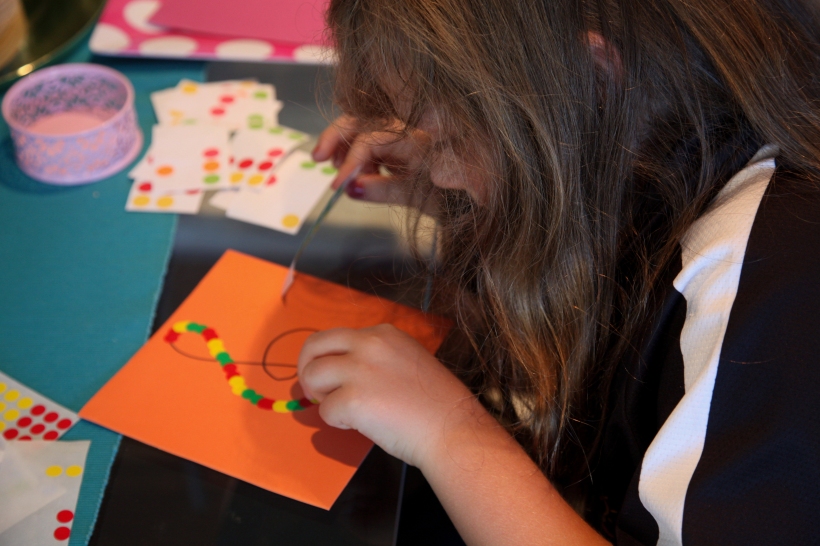
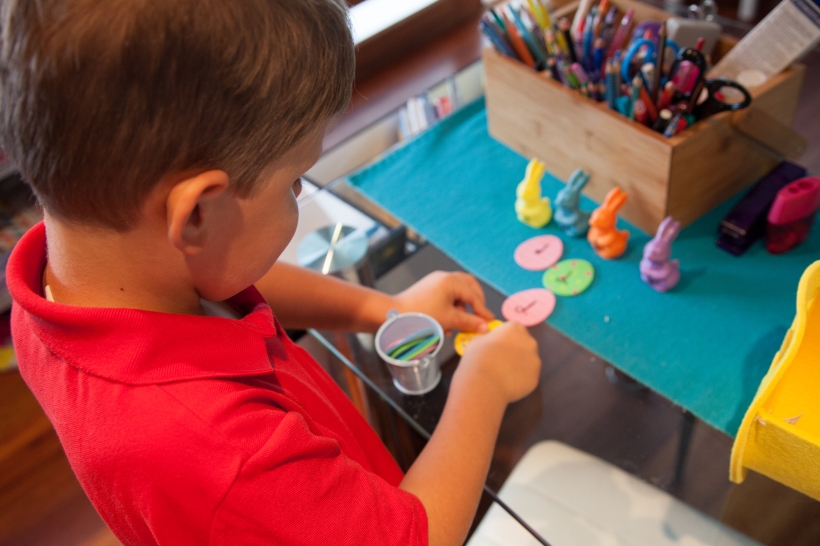
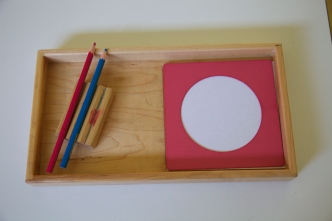
Boom whacker Composing– The child uses coloured crayons to create a composition using boom whackers (pictured on the right) Depending on the child they either draw coloured circles to represent their notes or they draw the circles in the correct position on some staff paper.
Bottom Shelf
Composing with Bells– The water colour paint is used to compose this time. I use water colour paper for this activity. They draw a circle to represent the note on the paper. If the child is more advanced they can use staff paper.
Composing with Xylophone– This is the same as the boom whacker composing but using a xylophone.

This is the note recognition/writing shelf. In the future I’d like another shelf just for writing. My father in law makes the shelves and at the moment he’s been too busy with other things to make another.
Top Shelf
Hungry Caterpillar bass and treble clef sorting– Here the child sorts the bass/treble clef cards under the bass or treble clef caterpillar. I made this one up myself.
Note Pegs– On each peg there is a note. The child matches the peg to the same note on the pink circle. Opening and closing the peg reinforces playing the piano on fingertips.
Car Parking– Each car has a musical symbol on it. The child matches the car to the correct parking spot. They love driving them into their spots! This was made by Tracy King
Middle Shelf
Alphabet cards & objects- Here the child learns the musical alphabet. First they put the cards in order and then match the objects to the cards.
Playdough– Here the child learns the letters in the musical alphabet, how to write them and where they are on the keyboard. I usually get them to make the letter with playdough first.
Writing treble clefs- Treble clefs are quite tricky to write, so I found a simple worksheet online where they can practice writing them.
Bottom Shelf
writing musical notes- I made these cards myself. The child traces the notes and the name of the note. I do also have sandpaper notes which I should put back out, but I need more space! (they will be on my future writing shelf)
Music note book- Here the child makes a book. They draw the music note and write it’s name.

This is the note value shelf. For some reason the children are drawn to this one. I think this is my favourite shelf to change each term. As you can see I love minions & the hungry caterpillar!
Top Shelf
Playdough – each page has a lolly jar and the child puts the correct amount of playdough lollies in the jar according to the value of the note.
How many ducks?– The child puts the correct number of ducks in the pond according to the value of the note.
Note value dominos- I made these using paint chips from Bunnings. One end has a note and the other a note. They match the notes to the correct number value
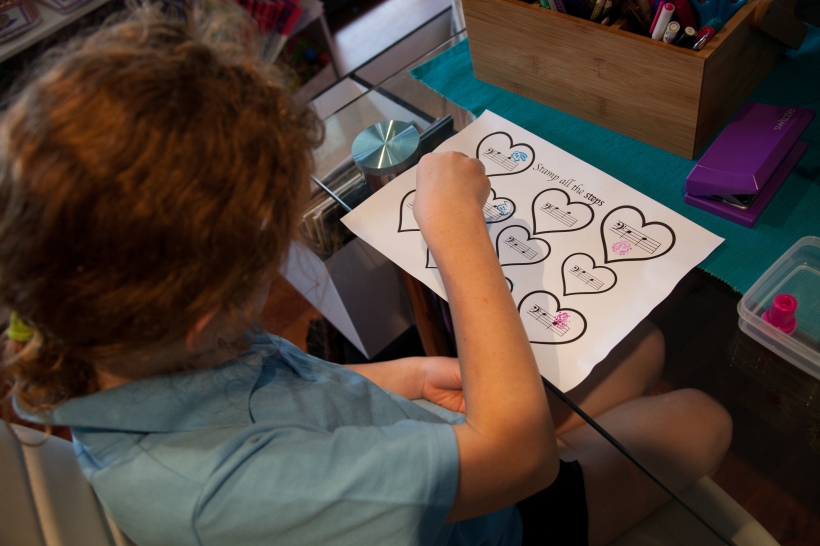
Note value stamping– The child stamps the value of the note. A crotchet gets 1 beat so they put one stamp.
Middle Shelf
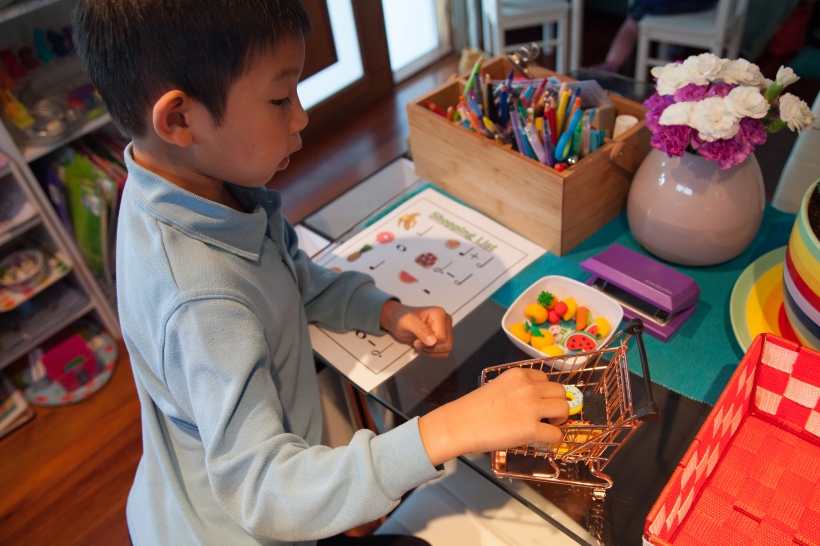
Shopping– They look at the shopping list and put the number of items in the cart according to the notes value.
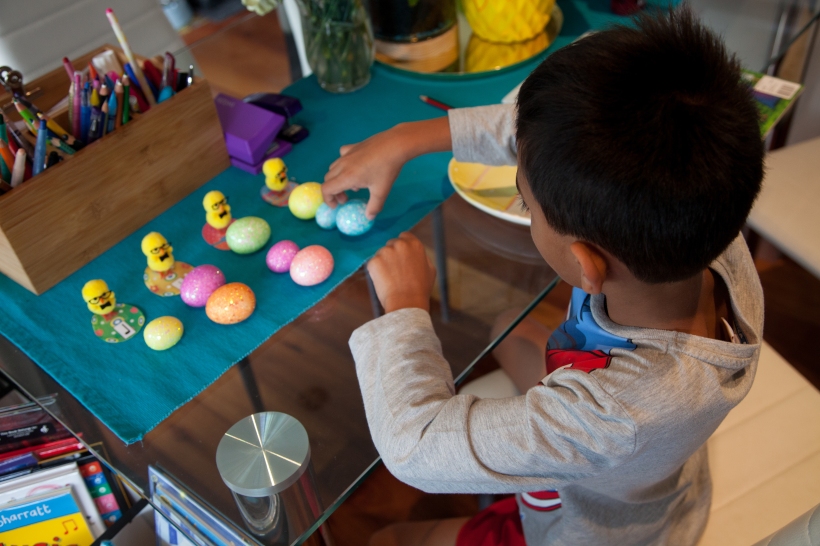
Minion race- I made this myself. This is a 2 player game. Each minion starts on the banana. Take turns picking a card and moving according to the value of the note and see who reaches the finish first.
Hungry Caterpillar– I also made this. The aim of the game is to see who gets the most food cards. As you land on a food you collect that many cards according to the notes value.
Bottom Shelf
Bowling– In the bag there is a wooden bowling set. On each skittle theres a note. The student rolls and adds up the notes they knocked over. To help younger kids add up they can use the small erasers in the blue bucket.
Threading– On the tray there are note addition cards. The student threads the beads according to the value of each note. Then they add them together.
Snakes & Ladders- This game was made by Sharon Ellam, another piano teacher. They are available to purchase on teachers pay teachers. You can sit near the piano to play. Its like regular snakes and ladders, but the music version! This game is very popular.

This is the musical instrument/rhythm shelf.
Top Shelf right of plant
Orchestra toy– On the top shelf is a very popular toy used to learn about instruments of the orchestra. It plays a variety of pieces/songs. As you add an instrument they start playing together.
Matching felt instruments to cards– It’s a bit hard to see but on the top right I have a few felt instruments in the green basket and their matching cards. They lay out the instruments and match with the cards.
Top Shelf
Percussion instrument book– This is like the composer book but musical instrument. I change the types of instruments each term.
Bass Drum flip book– The child colours & inside are facts about the bass drum
Middle Shelf
Matching instrument objects to cards– Here they lay out the cards and then match the objects to the cards.
Rhythm Listening– The child sits with a bingo card. Play a rhythm on the piano. The child identifies which rhythm you played and puts a stone on top.
Making Rhythms– The child chooses a card and makes the rhythm using toothpicks for bar lines and stones for the notes/rests/time signature.
Bottom Shelf
Percussion instruments & rhythm cards– Show the child a rhythm and they pick an instrument to play it. The cards vary in difficulty. Yes that is a pig dog toy you can see. It makes the most amazing pig sound!
Rhythm hands– These are handmade. Each hand has a rhythm and an action. For example clap behind your back or knock on the door.
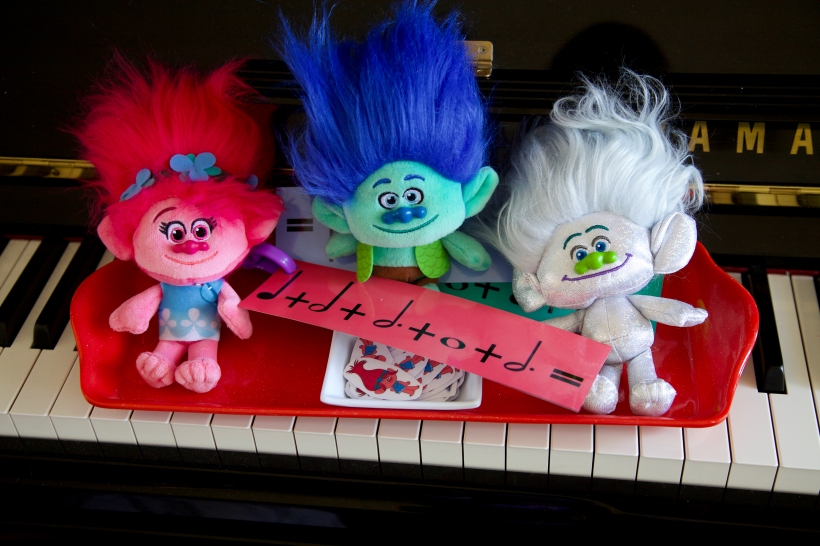
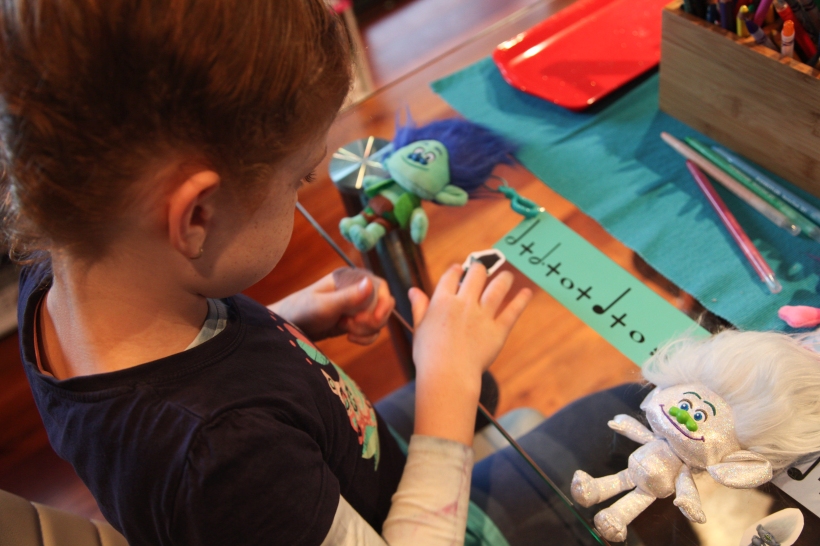
Lego rhythms– I got this idea online. The child makes a rhythm. The lego corresponds to the notes value.

This is the note reading shelf. This shelf was only temporary. I want another one made for this spot.
In front of plant
Bass/treble clef note cards– These are used to help some children with their note reading.
Top Shelf
Keyboard pillows & alphabet erasers- My mother in law made these pillows. Each one has a button on them. The child matches the correct letter eraser according to the note the button is on.
Note reading colouring– For this activity the child can take the note cards if they need to help them with note reading. They colour according to the colour and note listed at the bottom. These are from the book Color Note by Sharon Kaplan
Note word stamping– Using the letter stamps, the child stamps the correct note. Each page makes a word
Middle Shelf
Peg the notes– There are keyboard reading note cards & also notes on the staff cards. The child places a peg on the correct note name (letter). These are from Susan Paradis
Car parking note reading– This was made by another teacher. There is a letter on each car and they park it in the correct spot by identifying the name of the note.
Beanie note reading– Kids love beanies! In the basket there is a dice labelled with note names. I also have a staff mat. They roll the dice and then put a beanie on the note on the staff. This can also be played as a note race or a stepping/skipping race depending on where the child is at.
Bottom Shelf
Search & Find– These are also made by Susan Paradis. One tray is treble clef notes and the other bass. The child only has to find one note at a time on each sheet. For example they may have to find all the treble Es and put a button/stone on them.
Teach Piano Today Games– I am subscribed to Teach Piano Today. Each month I get some new games. I usually change the note reading games often. They all come with a set of instructions. This one is called Billy the Bendapillar. When playing this game the child learns to reading notes in the middle C position.

This is the lending library where a book can be taken home for the week. Below I have several practice pets they can also take home to practice with.
I hope you enjoyed this blog post. If you have any ideas for future topics please let me know! Also if you have any questions about any of the activities send me a message.
Laura
P.S more teachers should teach the Montessori way! Get inspired by some of these websites below!
Some useful websites
My facebook page Montessori Music Materials- https://www.facebook.com/montessorimusicmaterials/
Montessori Inspired Piano Teachers Facebook Page- https://www.facebook.com/groups/1069091889925746/
Susan Paradis- https://susanparadis.com/
Color my Piano- https://colorinmypiano.com/
Teach Piano Today- https://www.teachpianotoday.com/
Sharon Ellams Snakes & Ladders- https://www.teacherspayteachers.com/Store/Ellamentary-Piano
Composer flip books- https://www.teacherspayteachers.com/Product/Classical-Composers-Flipbooks-1645385
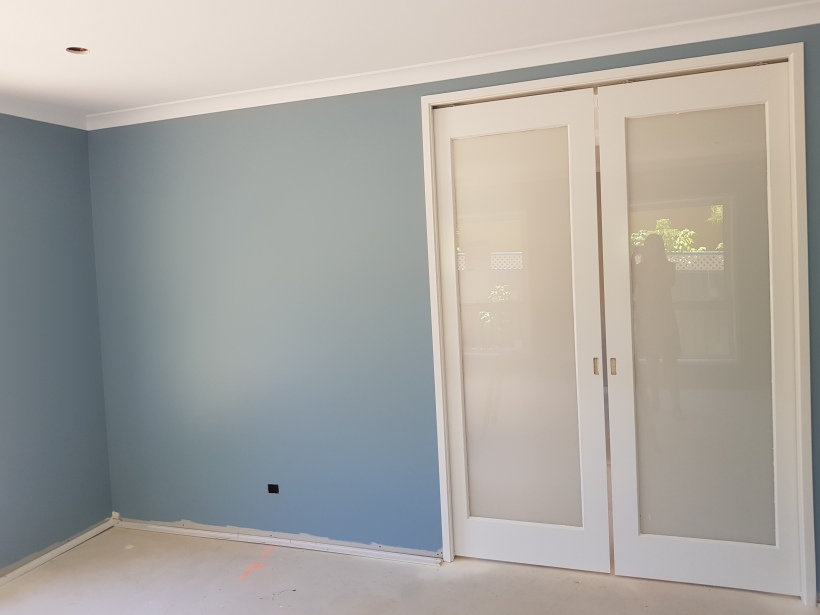 You enter the room through these sliding glass doors, which are going to look great once they touch up the paint. On the walls I decided on dulux palmer. It is such a relaxing colour and I was surprised how good it looked on the wall. To the left of the doors I was planning on putting a couch for parents who like to sit and wait. Somewhere next to the couch I’d love to have somewhere to put some puzzles/colouring for siblings who are waiting and would like something fun to do.
 This is a view from the sliding glass doors. As you can see there is so much light!! The flooring will be bamboo and the windows are going to have beautiful plantation shutters which will not be arriving for some time as they take 10 weeks!